Module 2, Lesson 2
Preamble
Approximate time to complete this lesson: 30 minutes.
Lesson 2 Video
To begin Lesson 2, watch this video (6 minutes, 3 seconds).

Review of Lesson 2
The 2012 Parts Definition Standards
Over the years there has been confusion over parts definitions. In the past it was left up to individual recyclers using only very broad guidelines. This lack of guidelines – especially when it came to assemblies – led to confusion. Mostly due to:
- Lack of consumer understanding and expectations;
- Recycler inconsistencies; and,
- Misleading information coming from a number of different sources.
In 2012 the Automotive Recyclers Association established new parts definitions. The objectives for this were:
- To provide easy access to the standards;
- To reflect changes in new vehicle types (e.g. hybrid, etc.);
- To encourage acceptance and use by all parties;
- To make it easier to publish; and,
- The need to be in sync with the interchange.
During this process part types increased from 75 to 300. Definitions were modified to sync with interchange. Stakeholders, including Mitchell, Audatex, and ICBC along with many others were part of the review process and all recognized these definitions because they minimize discrepancies between what goes into the estimate and the parts that will ultimately be delivered.
The ARA Parts Definition Website
In this section of the module we will learn:
- How to access the a-r-a.org parts definitions web-site.
- What data is available on the site for each part covered.
- What you can do to begin implementing this system in your business.
After completing this lesson, go to www.a-r-a-standards.org and review website.
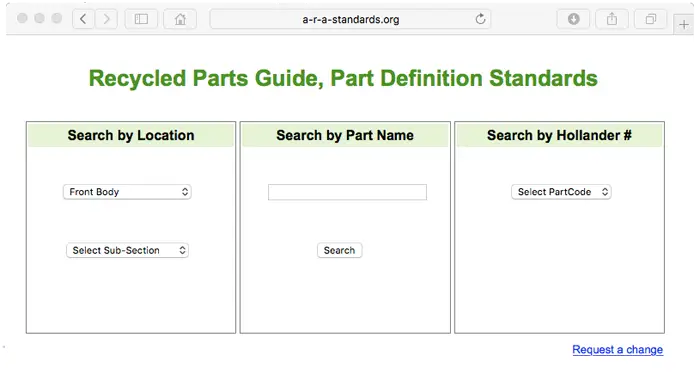
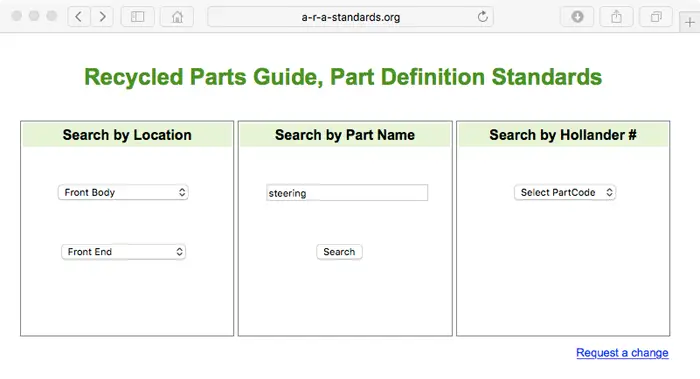
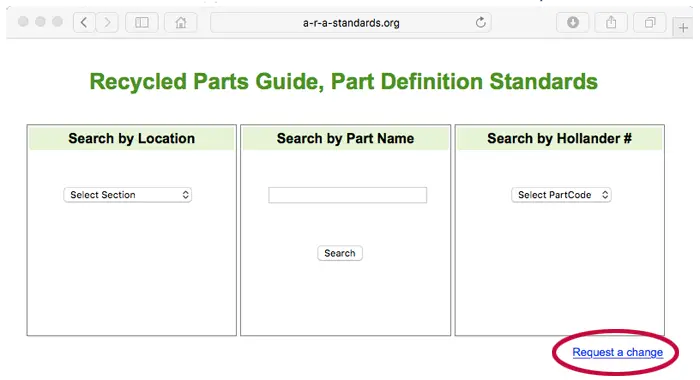
A part type search can be done by anyone of three search methods:
- Search by part location.
- Search by part name.
- Search by Hollander #.
Search by Part Location
To search by location use the drop down box and select an area (example “Front body”)
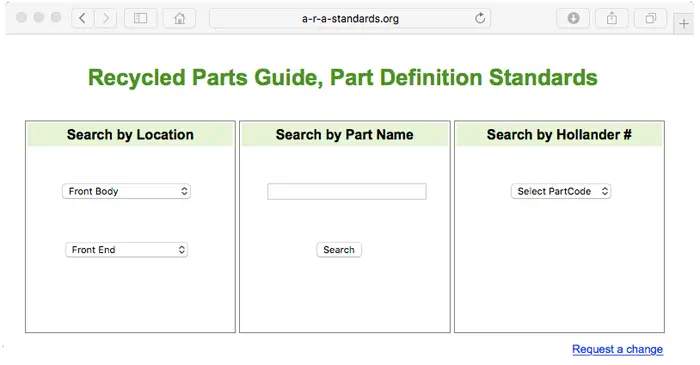
A subsection will appear – let’s select “front end”.
A window will then appear, since there are many sub-components in a front-end.:
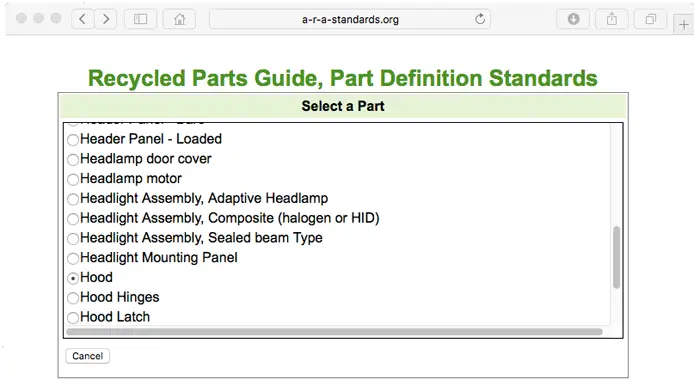
Then select the specific part type you want to see (e.g. “Hood”)
The screen will display definition details for the part:
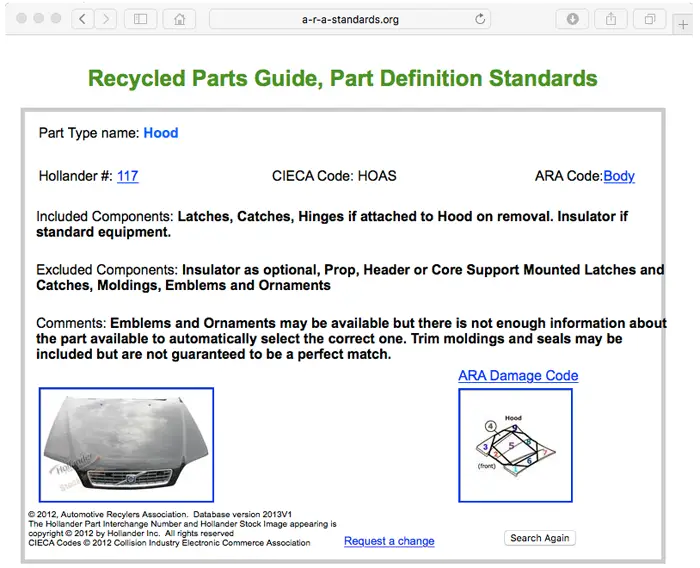
What you will see on this page:
- Part type
- Hollander #
- ARA Body Code: displays ARA grading criteria for the part
- Included components
- Excluded components
- Comments
- A picture of the part
- CIECA Code: the CIECA code stands for Collision Industry Electronic Commerce Association. The CIECA develops electronic communications standards that allow the collision industry to be more efficient.
Search by Part Name
Searching by part name will yield the same display information as searching by part location.
Type a word for the part name, such as, “steering” and press enter.
A box will appear that includes all of the part types that include the word “steering”.
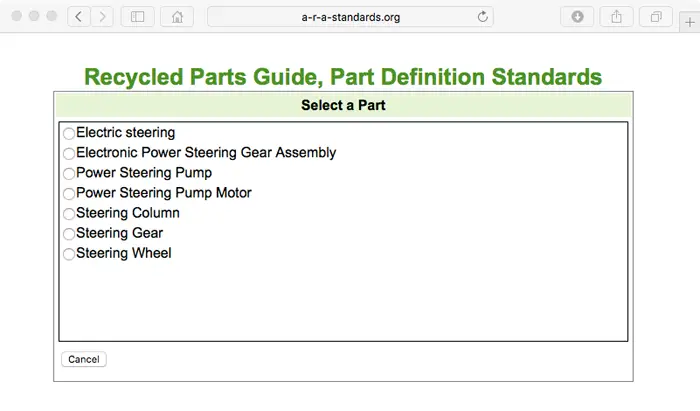
Select the part you are looking for. The system will also recognize common vernacular even though these words may not necessarily be the official word used by the ARA.
Search by Hollander #
This will yield the same results as previous.
There is also a change suggestion feature. In order for the system to keep current you can submit a request for change. Use ‘submit request for change’ feature. ARA periodically reviews all submissions and makes changes to the system.
Additional Reference Materials you will need as an inventory specialist:
ARA Damage Locator
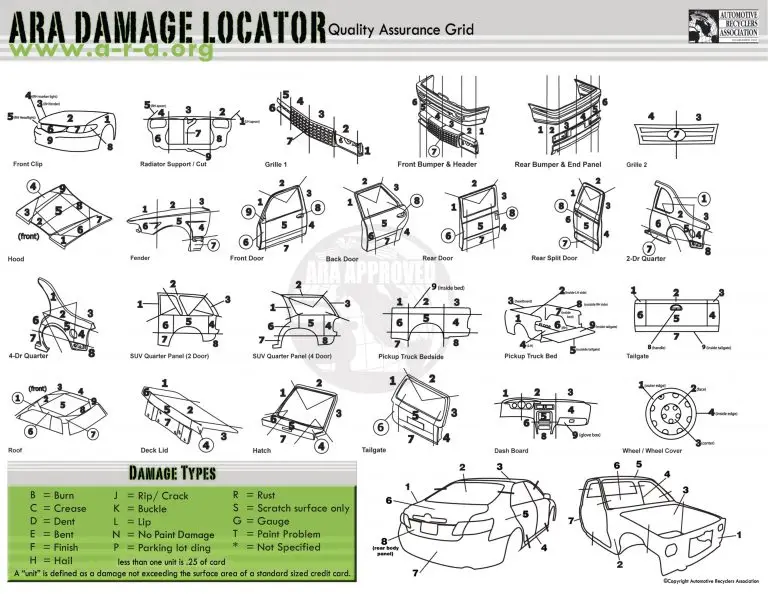
Damage locations, and how you can use this tool are discussed in the next lesson.
What should you as an inventory manager do to start putting these definitions in place and begin benefiting from them?
- Begin by training all staff on what the standards represent, how they can benefit everyone, and how to use the parts definition website.
- Ensure your employees complete the training process.
- Employees who inventory vehicles need to know what is included in assemblies and how to describe them.
- Those who dismantle vehicles must know what components to include in the assembly they remove.
- Those responsible for selling parts need to know what is included and what is not and to stress the value of assemblies.
- Those that deliver the parts represent the last stage in your quality control and must also be aware of the components of an assembly to ensure the customer receives what was ordered.
Continue to Module 2, Lesson 3
